Don't forget to visit my Etsy shop to see more of my work!

Wednesday, December 18, 2013

Write From the Heart with Kiwi Lane Designs and Authentique

Hello again!  It seems like it's been a long time since I've been on my blog... I think the holidays took over a little bit.    And they'll probably continue to take up most of my time for at least the next few weeks.  Blurg.  I think I'd rather be scrapbooking than... well, almost anything else that doesn't involve making more memories! ;)

It's my turn on the Kiwi Lane blog today, and I have a layout to share for our "Write From the Heart" segment.  If you're new to my blog or don't know about Kiwi Lane, here's the scoop- Kiwi Lane is a small, family owned and operated business that creates templates that make your scrapbooking a whole lot easier!  And everyone at Kiwi Lane is always overflowing with inspiration and creativity!!  You should definitely check them out, if you haven't already!


For this installment of Write From the Heart, I was able to work with one of my favorite manufacturers- Authentique!  I have loved them from the get go and their "Joyous" collection is another beautiful collection that those awesome creators have given us to help showcase some of our holiday memories!

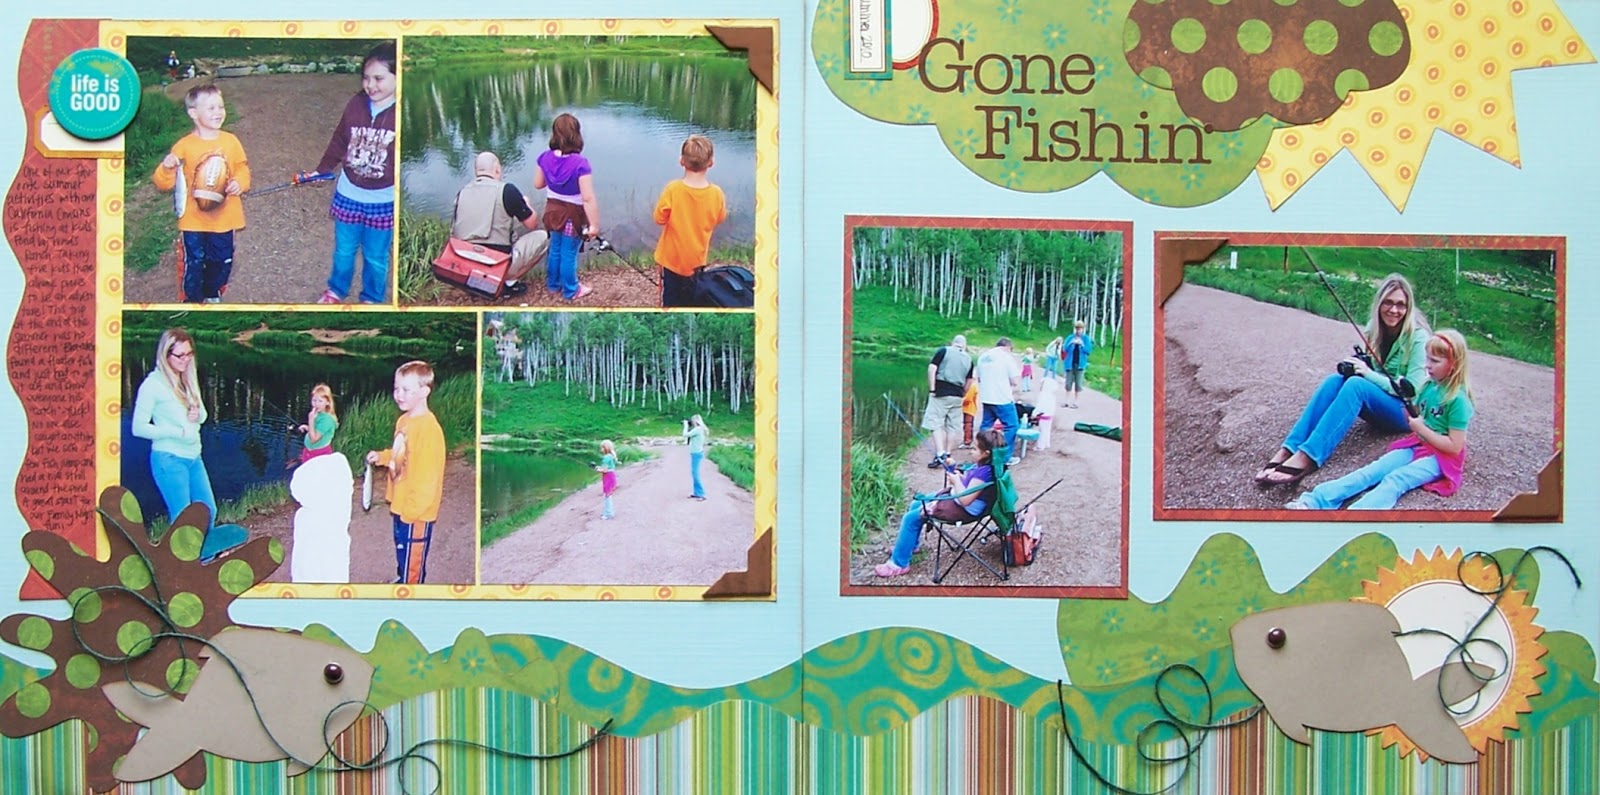
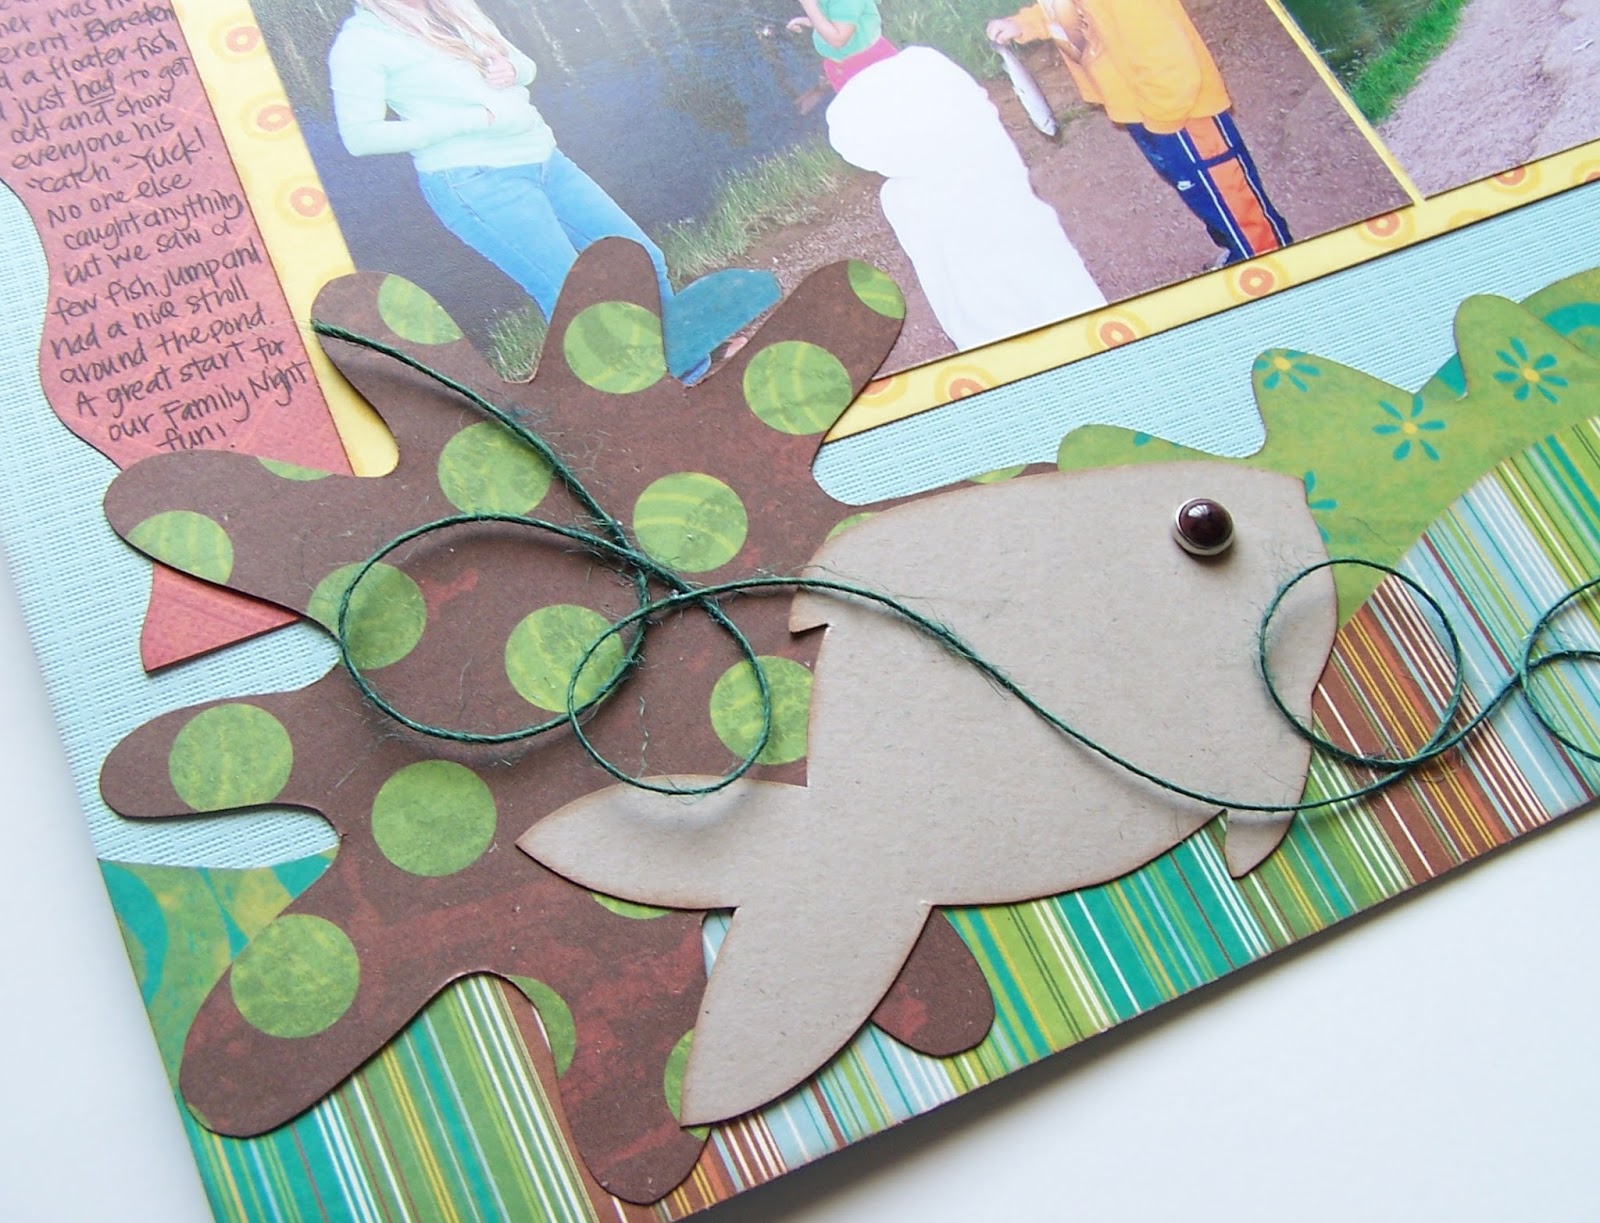
Supplies:  cardstock (Core'dinations); patterned paper, die cuts, small letter stickers (Authentique); ink (Ranger); glitter glue (Ranger, American Crafts); brads and flower punch (American Crafts); brown letter stickers (Pebbles, Inc.); washi tape (Downtown Tape); paper bag (craft supply)


As is my specialty, this page has some hidden journaling.  And a rather lengthy explanation of why.

This photo is of me and my Grandpa about 5 years ago.  It's the last photo I have of us together.  The next morning he aspirated on a drink, had a series of strokes and passed away in the hospital on New Year's Eve.  I did not even know this photo existed until my mom showed it to me a few years ago.  I had it printed and sitting in a box, waiting to be put on a page.  I just didn't know how to give this unflattering photo the words it deserved.  It wasn't until our inspiring blog-hostess-with-the-mostest, Kristy, started doing pages for her book about her beloved dad, who passed away earlier this year, that I realized it had to be done.  I had to find the words to go with this not-so-great photo.  Before I continue, you should know two things about me: 1) I don't like to show strong emotion... in anything.  2) I rarely cry.  I might tear up, but the tears are not quick to fall.  Finding the words for this layout went against both of those things.  I decided on a letter to my grandpa for the journaling format.  I figured it would be easier to write to him the things I wanted to say, rather than write like I was telling someone else what I wanted to tell him.  And it was.  It is probably the most emotional piece of journaling I have ever written... top three for sure.  Don't get me wrong- I am a stickler for journaling, but it's usually very superficial.  And the heartfelt letter on this page had me crying... no, I was bawling!  There were many times that I had to stop and wait for the tears to subside so I could see enough to continue.  And I hate crying.  But, it was worth it!  I was able to capture what I had in my heart and now it's preserved for the future.  

Now, because I am not an outwardly emotional person, I would never share my innermost thoughts and feelings with the general public.  But, because I like you, and we're friends, I'm going to let you take a peek at my heart.  This is what my letter to my grandpa says:

Dear Grandpa,
It’s been awhile.  Just under five years, to be exact.  Five years and not a day goes by that I don’t think of you, remember your stories or feel your presence.  I miss your chuckles when I say something silly.  I miss your stories (yes, I was listening!).  I miss the loving way you always looked at Grandma.  I miss your words of wisdom.  I miss the way you never failed to call me your Princess.  I never thought I would miss any of these things if they were gone.  But. I do.
I still have my memories of you, though, for which I’m truly grateful.  Like this photo.  This unflattering, quick snap of the camera that captured some of your last moments with us in this life.  It was Christmas Day.  We taught you how to play Apples to Apples.  You laughed and had fun... a rarity in those last few years.  You even ate some Christmas dinner- another rare occasion as your appetite seemed to diminish after your last birthday.  We were even able to tell you that we were expecting our second child.  It was a very good day!
I’m so grateful to have had you as my Grandfather.  Some people may think that 95 years was long enough to be in this life, and I agree.  You had a long, full life.  But, there will forever be a hole in my heart where I will miss you every day.  I’m thankful for the time I was allowed to be part of your life here on the earth, and even more grateful that we are part of an eternal family.  It’s comforting to know that I don’t really have to say, “good-bye.”  Just “until we meet again.”
Thank you for being my Grandpa. 

Love, 
    Your Princess

(Photo taken 12/25/2008; Journaling written 12/10/13)


Thanks for letting me share with you today!  And I encourage you to Write From the Heart- especially when it's hard to find the words!

Templates used:
Mini Scallops 1A, 2A
Christmas 1, 2, 3
Tiny Holiday 7T
Tiny Tags 1T, 6T
Tiny Brackets 1T, 4T

Wednesday, November 13, 2013

Ideas to Inspire with Kiwi Lane and Teresa Collins

Happy Wednesday!  It's my turn on the Kiwi Lane blog with an Idea to Inspire and here's what I came up with:

This month I was able to work with Teresa Collins' new Memorabilia collection. And can I tell you how much fun it was?!  I love the neutral grays and tans, with the bits of chalkboard elements, paired with the pops of blue.  When I looked at this collection alongside the featured templates this month (Nature, Abbie Road and Tiny Shapes), I though it would be fun to make some place cards and napkin rings for my Thanksgiving table.  I know that neutrals and blue are not the usual color choices for a fall table setting, but I knew it would be fun and different. 

So I have a little bit of a confession- I never seem to have enough time to do cutesy decorating in my house.  Yes, it's true.  I'm a paper crafter, yet I don't decorate my home with cute paper crafty things.  I just always seem to run out of time!  I should say I USED to run out of time- because now, with the Kiwi Lane templates, I can whip out quick and cute seasonal decorations in no time!  It took me about 7 minutes to make the napkin ring (seriously- I timed it!) and a little bit longer to do the place card (there's stitching and more pieces, so it takes a few more minutes- but not much!).  Here's what they look like:  


Of course, you would make a place card and a napkin ring for each person at your table- I was trying to figure out how long each one took to make, so I started with one.  Now that I know how little time they take, I'll finish making the rest for our Thanksgiving table!

For the place card, I used a 4" x 5" card base.  Then I cut a 3 3/4" x 4 3/4" piece of patterned paper, stitched around it, stamped a border just inside the stitching, and distressed the edge.  Then I cut a ring out of a pewter colored metallic card stock, using the Rings 2 template.  I stitched around the ring and distressed the edges.  Then I cut out some leaves (Nature 1 and Tiny Nature 1T and 4T) from patterned papers and glitter paper, inked the edges and played with them until I liked the arrangement.  For the oval (Tiny Shapes 8T) under the name, I made a little pouch with patterned paper layered with vellum and sewn together with some sequins between the layers.  To finish the place card, I used gold glitter Thickers from American Crafts.  I added a few sequins and was done!  It took me about 15 minutes to make the card, once I had chosen my papers and pulled out my supplies.  Here's a closer look:  


For the napkin ring, I cut a 2" x 6" piece of yellow cardstock, then cut a strip of patterned paper using the Happy Trails 1A template.  I inked the edges, adhered the patterned paper to the card stock and stapled the ends to form a ring.  I cut two leaves (Tiny Nature 1T, 4T), inked the edges and adhered to the ring.  I used some washi tape and some twine to make a bow to accent the leaves.  Super fast, super easy!  


I hope you liked my place card and napkin ring!  I sure enjoyed using the Teresa Collins Memorabilia collection- and I can't wait to finish making the rest of my table decor for Thanksgiving!  And don't forget- if you don't celebrate Thanksgiving where you are, you can use my ideas for a jumping off point for your own craftiness.  The place card would make a beautiful notecard- just switch the name for a greeting!

Thanks for stopping by and Happy Scrapping!

Tuesday, October 22, 2013

ITI Winner and Blog Hop Winner Re-draw

I have a couple of things to announce today and they are both winners!  The first one is the winner of the Kiwi Lane Halloween Templates:

TINA

Congrats Tina!!  Please email me your mailing address and I'll get those sent off to you right away! (glo_owens (at) msn (dot) com)

And the winner of a set of templates from Kiwi Lane's October Blog hop never claimed their prize, so it's time to pick another winner... and that is:

Blogger Brat said...
Gorgeous art! I love the first card. :) I love flowers and the texture you've created on this card.
October 4, 2013 at 4:09 PM
Congrats Brat!  You have two weeks from today to contact me so I can provide a short list of template sets to choose from.  Please email me at glo_owens (at) msn (dot) com.

Thanks for stopping by and Happy Scrapping!

Wednesday, October 16, 2013

Ideas to Inspire for Kiwi Lane Designs and a Giveaway!


Hello everybody! I’m here today with a mini album done with Pebbles’ Thirty One collection and a few of this month’s featured Kiwi Lane Templates.  


This album has lots of different shapes and sizes of pages and probably looks a little intimidating to make, but not with the templates!  (Don’t you just love them?!)  Here’s how you start:

Lay out your photo templates with the largest one at the back of the album and smallest on top, lining up the left edges where you will bind your book.  To give you an idea of the sizes of the pages, the front page is 3x3 and the back page is 5x7.  Then add your shapes at the edges of the photo templates.   Use removable adhesive, like washi tape or removable glue dots, to adhere the shapes templates to the photo templates so they stay together.


Pull the layers apart.  They should look something like the photo below:


Trace the templates onto heavy cardstock or lightweight chipboard.  I recycled file folders for my mini album.  And I numbered my pages to help me keep them in order.  This is what it should look like:


Start covering your pages, adding photos and memorabilia, journaling and embellishments, starting with the larger pages and working towards the smaller ones.  Use ink on the edges of everything to add shadow and dimension without more layers.  Here are the finished pages: 


I wanted a little bit of interaction in my book, so the back page has a flap that folds over the page.  It just adds a little more detail and a little more fun to the book.


I had so much fun making this album about the “Chem-mystery of Halloween.”  And the papers and stickers from Pebbles’ Thirty One collection were the perfect backdrop!!  

Now for some fun- would you like a chance to win your own set of Kiwi Lane Halloween templates?  And really, who wouldn’t?!  Just leave a comment on this blog post letting me know what kinds of projects you like to see using the templates.  Get a bonus entry for becoming a follower of my blog and leaving me a separate comment letting me know  (or letting me know you are already a follower).  Sounds good, yes?  I thought so! ;)  You have until this Monday, October 21st 2013 at 11:59 MST to leave your comments and be entered to win.  I’ll draw a random winner the next day and announce the winner  right here on my blog.

Thanks for stopping by and Happy Crafting!

Templates used:
Mini Aspen 1B, 2A, 2B, 3A
Tiny Hoiday 2T, 4T, 5T
Halloween 4, 2
Tiny Nature 4T
Photos and Mini Photos

Supplies:  cardstock (Provo Craft, Teresa Collins, We R Memory Keepers, DCWV); file folders (office supply); patterned paper (Pebbles/American Crafts); stickers (Pebbles); ribbon (SEI, Pebbles, Lil Davis Designs, craft supply); ink (Colorbox); brad (SEI); glitter glue (American Crafts, Ranger); epoxy dots (Teresa Collins); die cutting machine and embossing folders (Cuttlebug by Provo Craft); clear pocket (3L Adhesives); tiny bag (Whisker Graphics); wire (Provo Craft); twine (LilyBelle's Paperie on Etsy, Creative Impressions)

Tuesday, October 8, 2013

October Blog Hop Winner!!

Winner Winner, Chicken Dinner!!  The random winner of a set of Kiwi Lane Designs Templates is :

Blogger Emmie said...
love the pink and green. I have all the borders and just a couple of the accessories. I don't do very many cards...don't like giving away my work! hahahaha

Emmie- Please email me at glo(underscore)owens(at)msn(dot)com and I'll give you a list of a few sets to choose from.  You have two weeks from today to contact me, otherwise a different winner will be chosen.  I'll be waiting to hear from you!
Thanks for stopping by and Happy Scrapping!

Friday, October 4, 2013

October Blog Hop for Kiwi Lane

Welcome Kiwi Lane Blog Hoppers!  You should be hopping over from Michelle's blog.  If you came here any other way, I highly suggest you head back to Kiwi Lane's blog and start from the beginning so you don't miss any of the crafty goodness!  Don't forget to comment along the way because one lucky commenter from one of the participating blogs will win a $25 gift code to the Kiwi Lane Shop.  Here's the line-up in case you get lost along the way:


  1. Kiwi Lane http://kiwilane.com/here/blog/
  2. La-Vie Borde-Perry 
  3. Lyne Schnable-Blodgett 
  4. Jennifer Budge 
  5. MekaMatthews
  6. JeNn Nicholes 
  7. Joan Holmes Leitch
  8. Michelle King Beaudry
  9. Gail Owens  (You are HERE)


So not only is it Kiwi Lane's Blog Hop this weekend, but Saturday is World Card Making Day.  (click this link for some more fun with Kiwi Lane for WCD!)  This is the event that kicks off the season of cardmaking for the holidays.  But, instead of holiday cards, I have a few cards to share with you that show how dimension can be added to cards made with the Kiwi Lane Templates.  Here's what my cards looked like after I "Framed" them:
The first card I made was the simplest one and was the top right card:
Supplies:  paper (Authentique); card stock (Georgia Pacific); stamps (Technique Tuesday); ink (Ranger, American Crafts, ColorBox); punch (Marvy Uchida); resin flower (Making Memories)

Templates:  Sentiments 2B, Adorn 1B, Tiny Wildflower 3T, Tiny Brackets 1T, Tiny Accents 2T

This card is quite easy and really quick to make- simply trace, cut and ink all the pieces according to the "Framed" design.  Stamp your sentiment on the Tiny Bracket. Punch out a flower, curl the petals around a pencil to add some dimension, adhere it to the card and add a resin flower center.  Here's a better  view of the curled flower petals:
My next card was a little bit higher on the difficulty level, but still pretty darn easy:
Supplies: cardstock (Georgia Pacific); patterned paper (3 Bugs in a Rug); brad (We R Memory Keepers); pearls (Doodlebug); stamp (7 Gypsies); ink (Ranger); pen (Uniball Signo); punch (Martha Stewart)

Templates used: Tiny Tags 7T, Tiny Accents 1T, Tiny Holiday 7T, Paradise 4

I used the small poinsettia to do a double layer of leaves under the flower.  I used a white ball point pen to outline a few of my shapes to add definition to the layers.  And I bent the four layers of the flower to add dimension without having to add anything between the layers.  Here's what it looks like from the side:


My third card was a little bit more involved to make, but still super easy using the templates:
Supplies: cardstock (The Paper Company); patterned paper (3 Bugs in a Rug); letter stickers (Echo Park); twine (Owl Supply on Etsy); glitter glue (American Crafts); sequins (Making Memories); moon (craft supply); rhinestone star (Teresa Collins); pen (Staedlter); ink (Ranger)

Templates used: Sentiments 3A, Adventure 1 & 2, Card Strips 1/2" & 1"

For this card, the layers of templates are simple.  But, to add more depth, I added foam adhesive to the star shape.  And I added the sequins, rhinestones and glitter glue for some detail.  To top everything off, I did a hand written sentiment (you could add a stamp if you'd rather).  This card was a bit more labor intensive than the previous ones, and took more time, but only because I had to wait for the glitter glue to dry.  The actual cutting and inking was easy!  Here's a closer look from the side:

My last card is the most labor intensive of the day:
Supplies: cardstock (Georgia Pacific); patterned paper (My Mind's Eye); twine (LilyBelle's Paperie on Etsy); brads (My Mind's Eye); pearls (Making Memories and Doodlebug); jewel (Doodlebug); vellum (Provo Craft); stamp (Heidi Grace Designs); ink (Ranger, Colorbox); pens (Uniball Signo, Staedtler)

Templates used:  Adorn 3A, Tiny Tags 1T & 6T, Tiny Nature 2T

This card really is fairly self explanatory- all you do is trace, cut and ink the pieces using your Kiwi Lane Templates.  The details make this card!  I used a black pen and a white pen to go around the pieces, adding dimension and detail. And I added a vellum butterfly that I also drew some detail on.  Here's a closer look at that detail:

Whew!! That was a marathon post!  I hope you enjoyed seeing my cards and I really hope it inspires you to go and create your own cards using Kiwi Lane Designs Templates!

Don't forget to leave a comment on my blog (and all the blogs along the hop) for your chance to win a $25 gift code to the Kiwi Lane shop.  One lucky commenter will be chosen from one of the participating blogs and announced on the Kiwi Lane blog on Thursday, October 10th.  You have until 11:59 pm MST on Sunday, October 6th, 2013 to comment.

I think, since you made it through that super long post (and the rest of the blog hop), you deserve a chance to win something nice from me- don't you?  Leave a comment on my blog letting me know which card was your favorite and I'll have my own little drawing for a set of templates... I may even let the winner choose the set they want. ;)  You have until Sunday, October 6th at 11:59 pm MST to comment and the winner will be announced here on my blog on Tuesday, October 7th, 2013

Thanks for stopping by and Happy Scrapping!

Wednesday, September 25, 2013

Write From the Heart for Kiwi Lane Designs


Happy Wednesday!  I'm here today with (hopefully) some inspiring journaling tips for your pages.  This month Kiwi Lane has teamed up with the fabulous people at Simple Stories.  I just love Simple Stories' paper and was thrilled when I was given their "Smarty Pants" line to work with- complete with a package of some of the cutest brads I've ever seen!  Seriously, even if you have no use for a school-themed collection, you should have this one! 

For my layout today, I knew that I wanted to do journaling two ways.  First, I wanted the generic journaling (the who, what, when) visible, but the story of these particular photos hidden so I could focus on using some of that fantastic paper, brads and my Kiwi Lane Templates to make some school themed embellishments.  To accommodate my hidden journaling, I found some small paper bags in my supplies and included them in my framing process, which started off looking like this: 

(Remember: because you are not committed to anything when framing your layouts, your final product may look different than your originally planned page.... which is what happened here and why things will look a bit different on my finished page.)

My finished layout:  
Supplies: patterned paper, brads, card stock stickers (Simple Stories); pockets (Whisker Graphics); twine, paper clip, ribbon (craft supply); ink (Ranger); flower (Bazzill); circle punch (Marvy Uchida); washi tape (DownTown Tape)

I did my bits of obvious journaling with the cardstock stickers that are in the "Smarty Pants" collection- I added "4th grade" to the file folder tab on the title, I added the school year to the composition book I made using one of the 3x4 printed images on the paper and I added my daughter's name to the larger photo of her.  Really, could it get any easier?

I love that some of my tag templates fit perfectly inside the bags to hide my other journaling!  I also made a pull out tab with hidden journaling by combining a 3x4 photo template and a tiny bracket template- then slid it under a 4x4 photo so the bracket part sticks out and the journaling is hidden. I added brads to each of the journaling spots to make them easier to pull out when needed. 


Here are some of the details:
For the title and top border, I used a border strip from one of the sheets of Smarty Pants paper and cut it in half, splitting it in the center of the layout.  I then cut 2 4x6 pieces of the yellow star paper to fill in the rest of the strip across the top.  I used the Abbie Road 2B border to trace and cut out the pencil border from another sheet of the Smarty Pants paper and layered that on top of the yellow paper.  

For the red notebook- it was a printed 3x4 card on one of the sheets of Smarty Pants paper and all I did was round the corners on the right and add some ribbon to make the spine of the notebook.  

For the layered shapes below the red notebook- I cut the Journey 2 shape out of polka dot paper from the Smarty Pants collection and the small star from the Tiny Accents set.  I used a circle punch to make the circle. I attached a flower to the enter of the star with a clock brad (Ooooh, cute!!), and layered the star, punched circle and Journey 2 shape with foam adhesive between each layer.

Ok, I know there are lots more little details on this layout.  Most, if not all, of them were done using just what came in the Smarty Pants collection kit.  It was so easy to use, and so much fun!!  If you have any questions about anything on this layout, feel free to ask me in the comment section.

Templates used:
Sunnybrook Lane 1A & 1B
Abbie Road 2B
Tiny Brackets 1T, 3T
Tags 2, 4
Journey 2
Tiny Accents 3T

Thanks for stopping by and Happy Scrapping!

Wednesday, August 28, 2013

Write from the Heart for Kiwi Lane


Hello Kiwi Family (and anyone else who happens to come across my blog)!  It's been a long time since I've been here on the blog or had a turn on the Kiwi Lane blog- I was up at the beginning of last month and now I'm here at the end of this month.  But, the powers that be must have been inspired, because our family had an unexpected move during that time and we are now (sort of) settled in Southwestern Wyoming.  Anyone else in this area?  I need someone to point me in the direction of the local scrapbook store! ;)

On to business- for this week's Write from the Heart, I was super excited to use Jinger Adams' delicious new line "Sweet Tart"!  It is so bright and fun and perfect for some summer photos.  I chose to scrapbook a little summer outing we had as a family a few years ago (yes, I'm that far behind in my scrapbooking... I'm sure *none* of you can relate, right? ;) ). My husband had been told about an abandoned mining town that was tucked up in the hills west of our town and he wanted to go find it- so off we went to explore! 

I knew I wanted to use a spray ink with the templates and I knew I wanted to journal in the white space from the spray, but other than those two things, I had no idea where this layout was going to go.  Sooooo... this is where I would normally have a "before" photo for you.  But I don't have one.  This layout was totally a "fly by the seat of your pants" kind of layout, which is not very typical for me.  I expected to play with the ink a little and have a few layout rejects before I settled on one I liked- but this was the first one!  And I liked how it turned out!!  I should fly by the seat of my pants more often! ;)

Here's what I ended up doing:  I put a few of the Rings templates down on the the white card stock and sprayed one color, then added another ring and sprayed another color.  After the spray dried, I added a few more rings cut out of patterned paper to add a bit more dimension.  Then I matted my photos and cut out some Tiny Tags and a Wildflower and tucked them behind things, layered with some of those awesome, sparkly plastic flower shapes from Jinger Adams' Sweet Tart collection.  I added my hardware (brads, clips), title and date and then started to journal in the white space of the sprayed rings.  That's it!  I hope you try using the white space from spraying your templates with spray ink- it adds yet another layer to the framing method and it's super fun... and kind of addictive.  I think I want to try this again! 


Templates used:
Rings 1, 2, 3, 4
Wildflower 1
Tiny Tags 1T, 5T, 6T, 7T

Thanks for stopping by and happy scrapping!

Monday, July 8, 2013

KLD July Blog Hop Winner!

I hope everyone had a great weekend- especially on the Kiwi Lane blog hop!  And I hope you were able to walk away with your creative well filled to the brim with inspiration!  Now for what you've come back for- the powers that be (at Random.org) have chosen the winner of a set of Wacky templates-
Sara
who said:
What a great layout! It fit a lot of pictures without looking busy. I tend to shy away from "action shot" pictures. I always go for the pictures where they are looking at the camera being cute b/c they are easier. 

You lucky duck, you!  You have until Monday, July 22, 2013 to email me at glo_owens@msn.com with your mailing address.  If you don't respond, I'll draw another winner.

Thanks for stopping by and happy scrapping!


Friday, July 5, 2013

Happy July!! Kiwi Lane Blog Hop


Howdy!  I know you probably have something great planned for this beautiful July weekend, especially if you live in the States.... but I sure am happy you took some time to make your way through another fan-tab-ulous Kiwi Lane Blog Hop!  I hope you've been enjoying yourself thus far and I'm betting you've seen some great stuff.  You should have come here from Jessica's blog.  If you didn't, hop on over to the Kiwi Lane blog and start from the beginning.  I'm the last one on this hop, but make sure you leave a comment on my blog (and all the others, including the Kiwi Lane blog!) for a chance to win a prize- a $25 gift code to the Kiwi Lane Shop!  Hooray!!

Here's a list of all the blogs in case you get lost along the way:


  1. Kiwi Lane
  2. Monique Liedtke
  3. Jennifer Budge  
  4. Cari Locken 
  5. Jennifer Nicholes 
  6. Regina Mangum 
  7. Becki Adams 
  8. Julie Ann Cordero
  9. Jessica Laureano 
  10. Gail Owens    (You are HERE!!)

Do you have photos of certain things that you don't scrapbook very often?  I have a LOT of photos from family fishing trips and they tend to get pushed to the back of my box and skipped over for photos that are "prettier."  Let's face it- girly pages with all the glitter, jewels, flowers and frills are just more fun!  So the fishing photos sit and wait while I work with photos that can have flowers and bling, but that's not going to be the case from now on!  Why?  Because I have the Happy Trails, Paradise, Wacky and Tiny Wacky template sets from Kiwi Lane.  Between those 4 sets, I have everything I need to make a fantastic (non-girly) fishing page:
I used some super old (but still loved... by me!) paper, embellishments and letter stickers from Scenic Route to make this layout.  And instead of cutting the Happy Trails into, well.... trails, I used just one edge to get a wavy line border.  I did the same thing to the strips by the photos on the left page.  See how multi-functional the trails are?!  Love them!  Here's what my page looked like when I "Framed" out my layout:
Sorry for the crappy cell phone pic!  

And here's a detail of one of my fish with the twine/fishing line:

Kiwi Lane Designs Templates used:
Tiny Wacky 1T, 2T
Paradise 1, 5
Wacky 1, 2, 3
Happy Trails 1A, 3A, 3B

I hope this inspired you to pull out some photos you don't often go to, along with your templates, and see what you can come up with!  Do you think you need another push towards being inspired?  How about if a prize is involved?  A template set, maybe?
One lucky commenter on my blog will win a set of Wacky Accessory templates.  Just let me know in your comment what photos you tend to shy away from because they aren't what you typically like to work on. (It doesn't have to be a separate comment- one comment will enter you in both drawings.  You have until Sunday, July 7, 2013 at 11:59 PM MST to leave a comment.  Must be a resident of the United States or Canada to win template set.) Can't wait to see what everyone says!

Remember to leave comments at every blog along the hop to be entered to win the $25 gift code from Kiwi Lane!  One commenter from one of the blogs will win!  You have until Sunday, July 7, 2013 at 11:59 PM MST to enter.  

Thanks for stopping by and Happy Scrapping!

Wednesday, July 3, 2013

Write from the Heart with Kiwi Lane.... and Downtown Tape!


Supplies: patterned paper, small letter stickers (Simple Stories); washi tape (Downtown Tape); brad (American Crafts); glitter letters (Creative Imaginations); ink (Ranger); pen (Staedtler)

Kiwi Lane Templates used: Paradise 4, Tiny Accents 1T, Tiny Wacky 1T, Happy Trail 3A

Do you every have "leftover" photos?  You know, the ones you print thinking you'll use them on a layout, but they end up just not fitting?  What do you do with them?  I usually give them to my daughter and let her use them for her layouts, but I kept finding these fun photos of her and her cousin that I just couldn't let go of.  I knew the day would come when I could put all those random extra photos together- and I was right!  

My brother and his family are moving to Guam this month- and this includes my daughter's BFF cousin.  I wanted to make a page with some of those photos as a glimpse into their friendship.  I set to work with my templates, some fun paper by Simple Stories and some marvelous tape from Downtown Tape- an awesome trio!  First I chose my background paper and started to lay out my page.  It looked something like this:
Of course, I always end up moving things around and changing some photo sizes while I'm making the layout.  For instance, I had a flower covering most of a head, so I moved it.  One more reason I love using the Kiwi Lane templates is this planning process!  I knew I'd need a pretty big space for journaling and the templates helped me plan around that space without guessing where things would end up.  I was able to cut my large piece of lined paper (I'm a big fan of lined paper for hand-written journaling!!) and plan around it! No guessing and cutting and wasting pretty paper!  Love it!!  And this is the journaling I ended with:
When I'm planning on doing large sections of hand-written journaling, I cheat and write it all out first on scratch paper, making corrections along the way.  Then I use that to read off of and do my journaling on the page.  I still make mistakes when I'm doing my writing, but my thoughts are a bit more organized.

I loved using the washi tape from Downtown Tape as I would use ribbon- looped behind the top right photo for some added embellishment.  Did you know that you can keep the tape from sticking to itself (making it look more like ribbon) by dusting it with talcum powder?  This is what I did to keep my loops from completely flattening out.  I also made sheets of washi out of the tape that I could trace a template on and easily cut it out- the layered flowers on the page are both made using that technique.  Here's how:

Lay strips of washi (long enough to span the width of the template you intend to trace) sticky side up, slightly overlapping the edges.  When you have enough laid out to accommodate the size of the template, start laying strips of washi tape sticky side down and perpendicular to (or criss-crossing) the washi that is laying sticky side up.  It should look something like this:
Now give it a good rub to make sure it's all stuck together.  Then place your template on top and trace:
I used a pencil to trace and found that it worked quite well and didn't leave dark marks that I had to make sure I cut off.  I also found that cutting the exposed tape off your washi sheet made for easier cutting (nothing extra got stuck to me or the scissors that way).  Here's what my flower looked like:
And I loved the finished look because it has kind of a transparent/plastic/paper look that is hard to see when it's laying on the mat, but this is what it looks like in the light:
Kind of fun!  The orange one had more of a grid pattern because it was lined washi tape.  And here's what it looked like on my page:
And, of course, I had to make a cute little card with some of my scraps:
Kiwi Lane Templates used:  Tiny Floral 3T, Tiny Wacky 2T, Thoughtful 2A

I used the same washi tape layering method to make the pink fluff behind the sentiment.  I love how it just gives a little bit more dimension to the card without adding too much bulk!

Are you as obsessed with washi tape as I am? ;)  Try giving this technique a try!  I'd love to see what you come up with so don't forget to comment with a link to your creative endeavor!

Don't forget to stop by on Friday- Kiwi Lane is doing their monthly blog hop and I have a 2 page layout to share... and maybe a prize will be involved... ;)

That's it for now.  Thanks for looking and happy scrapping!